Getting started
How to Make a Sourdough Starter from Scratch
A sourdough starter is a living culture made from flour and water. With regular feeding, naturally present yeast and bacteria establish themselves and eventually become strong enough to raise bread.
Making one is simple, but it rarely follows a perfect daily schedule. You may see rapid activity followed by several quiet days. Temperature, flour, water, and feeding routine all affect how quickly the culture develops.
The goal is not to make the starter look impressive once. The goal is to build a culture that rises predictably after repeated feedings.
Starter Basics
Starter is a living flour-and-water culture. Microorganisms from the flour, environment, and your equipment gradually create a stable fermentation community.
Feeding gives that culture fresh flour and water. After feeding, a healthy starter consumes the fresh food, produces gas, becomes bubbly, and rises in the jar.
A new starter is not ready just because it bubbles once. It should rise reliably after several consecutive feedings before you depend on it for bread.
Minimal Equipment and Ingredients
Ingredients
- Flour
- Water
Whole-wheat or rye flour often produces visible activity quickly because it contains more of the grain. White bread flour or all-purpose flour can also work.
You can begin with wholegrain flour and gradually switch to the flour you plan to use for regular feeding.
Equipment
- Digital kitchen scale
- Clean glass jar
- Loose-fitting lid
- Spoon or small spatula
- Elastic band, tape, or washable marker
- Second clean jar, optional but convenient
Starter Process Overview
- Mix equal weights of flour and water.
- Leave the mixture loosely covered at room temperature.
- Keep a small amount and remove the rest.
- Feed the retained starter with fresh flour and water.
- Mark its level and watch how it changes.
- Repeat the routine every day.
- Continue until the starter rises predictably after feeding.
- Give it one or more strong feedings before using it in bread.
Day 1
Mix Flour and Water
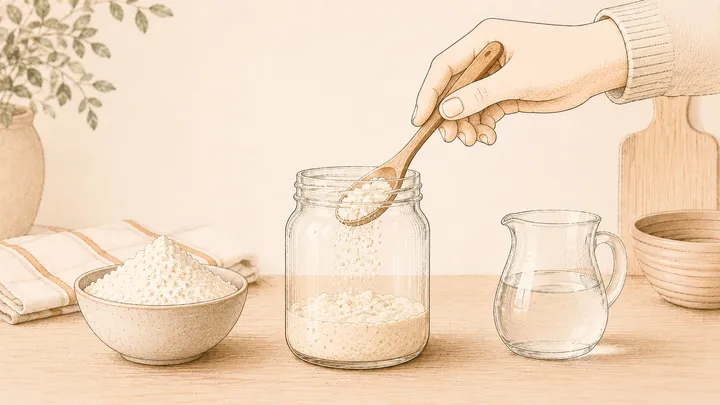
Place equal weights of flour and water in a clean jar.
A small amount is enough. For example, you could begin with:
- 30 g flour
- 30 g water
Mix thoroughly. Scrape down the sides so you can clearly see future growth.
Cover the jar with a loose lid. The lid should protect the mixture without creating a tightly sealed pressure container.
Mark the starting level
Place an elastic band around the jar at the top of the mixture, or use tape or a washable marker. This gives you a clear reference for any rise.
Leave the jar at a comfortable room temperature and check it occasionally.
Temperature guidance: approximately 22–26°C is comfortable for starter development. Cooler conditions generally slow the process. Avoid direct heat, hot water, or placing the jar in a hot oven.
Days 2–3
Begin Regular Feeding
After roughly 24 hours, inspect the starter. You may see bubbles, a noticeable rise, a change in smell, or almost no visible activity. Any of these can be normal at this stage.
Keep a Small Amount
Transfer a small amount of starter into a clean jar and remove the rest. This removed portion is often called discard.
Removing part of the mixture prevents the quantity from growing endlessly and ensures the remaining culture receives enough fresh food.
Feed at a 1:1:1 Ratio
For a simple beginner routine, use equal weights of:
- Retained starter
- Fresh water
- Fresh flour
For example:
- 20 g starter
- 20 g water
- 20 g flour
Mix well, clean the jar sides, mark the new level, and loosely cover the jar again.
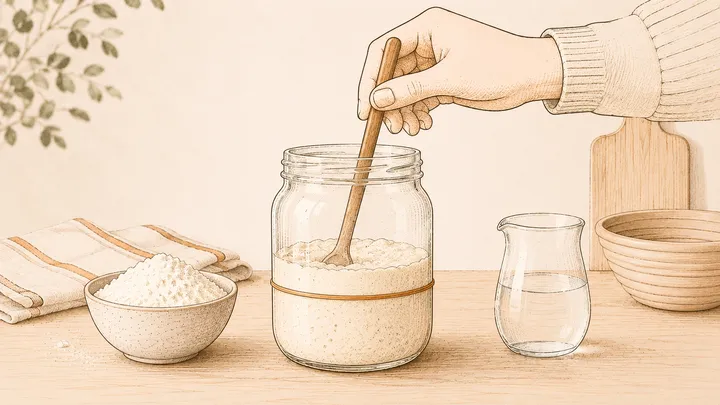
Early development
The Early Rise and Quiet Phase
A new starter may suddenly rise dramatically during its first few days. This can look like instant success, but it does not necessarily mean the mature sourdough microorganisms are established yet.
This early burst is often followed by a quieter period. The starter may stop rising, produce fewer bubbles, or appear less active for several days.
The smell may also change during this period. It can move through floury, fruity, sharp, cheesy, or strongly fermented stages before becoming more predictably sour.
Days 4 onward
Continue the Daily Routine
Continue feeding approximately every 24 hours while the starter is still developing slowly.
- Inspect the starter before feeding.
- Keep a small measured amount.
- Remove the remaining starter.
- Add equal weights of fresh water and flour.
- Mix thoroughly.
- Mark the starting level.
- Observe its rise, bubbles, smell, and peak.
Try to feed at roughly the same time each day. Exact minute-by-minute precision is unnecessary, but a consistent routine makes progress easier to judge.
Adjust Only When There Is a Reason
Avoid changing flour, ratio, temperature, jar, and feeding frequency all at once. Consistency helps you understand what the starter is actually doing.
Once it begins rising and falling well before the next scheduled feeding, you can feed it more frequently or use a larger feeding ratio so it has enough food between feedings.
Readiness check
When the Starter Is Ready
Do not judge readiness by age alone. A starter is useful for bread when its behaviour becomes repeatable.
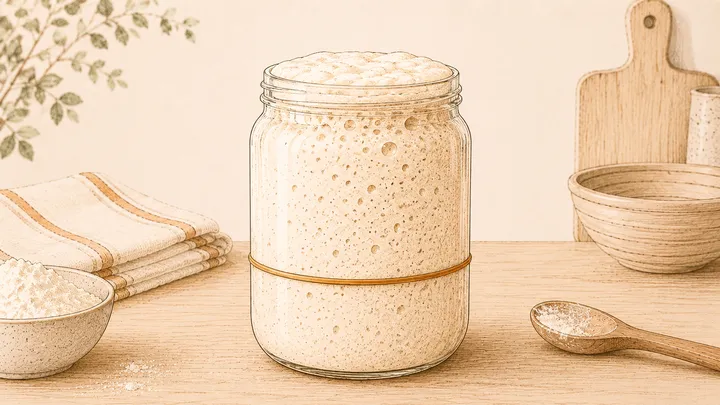
A ready starter should usually:
- Rise clearly after feeding
- Approximately double in volume reliably
- Repeat that rise over several consecutive feedings
- Contain many bubbles throughout the jar
- Develop a slightly domed top near peak
- Smell pleasantly sour, fermented, or fruity
- Reach peak within a reasonably predictable time
- Remain strong enough to hold its height before beginning to fall
Practical readiness test: after a feeding at comfortable room temperature, a mature starter often doubles within roughly 4 to 8 hours. Treat that range as guidance, not a strict pass-or-fail rule.
Before baking
Prepare the Starter for Its First Bake
Once the culture behaves reliably, give it a normal feeding and let it rise toward peak before using it in dough.
Make sure you prepare enough starter for:
- The amount required by your recipe
- A small amount to keep and feed afterward
Use the starter while it is well risen, bubbly, slightly domed, and still holding its height. Do not wait until it has fully collapsed.
This is where the regular Crumblytics baking flow begins:
- Starter Preparation
- Warm-up, when coming from the fridge
- Feeding
- Rise
- Autolyse as the starter approaches readiness
Storing an Established Starter
Once the starter is established, you do not necessarily need to feed it every day forever.
If You Bake Frequently
Keep it at room temperature and feed it regularly, adjusting the feeding interval to how quickly it rises and falls.
If You Bake Occasionally
Keep it in a clean jar in the refrigerator. Cold storage slows fermentation and reduces how often it needs attention.
Before baking, take it out, allow it to warm gently, feed it, and wait until it becomes active again.
Common Starter Problems
It rose strongly, then stopped
This is common in the first days. Continue the feeding routine and judge maturity only after the starter begins rising consistently.
There are bubbles but very little rise
The mixture may be too thin to trap gas, the flour may behave differently, or the culture may still be developing. Keep the ratio and routine consistent before making large changes.
It smells strongly of alcohol or solvent
The starter may have exhausted its food. Feed it and observe whether the smell returns to a cleaner fermented aroma as it becomes active.
Liquid forms on top
A greyish or brownish liquid can appear when an established starter is hungry. Mix it in or pour it off, then feed the starter.
It develops a dry skin
The jar may be too exposed. Use a loose lid that limits evaporation while still avoiding a tightly pressurised container.
It grows mould or unusual colours
Discard the entire starter if you see fuzzy mould or pink, orange, red, or otherwise suspicious coloured growth. Clean the jar and begin again rather than trying to save a contaminated culture.
It is growing too slowly
Check the room temperature, use fresh flour, avoid chlorinated or unusually treated water where possible, and keep the feeding routine consistent. A cooler kitchen may simply require more time.
The jar is overflowing
Use a larger jar and keep the starting quantity small. The container should leave enough space for the starter to at least double.
How Crumblytics Fits into the Process
The Crumblytics beginner guide explains what starter is, why it needs feeding, where you can obtain one, and how to grow a simple culture from flour and water.
Once your starter is established, the guided bake flow helps you prepare it for bread:
- Starter Preparation: begin with the culture you keep between bakes.
- Warm-up: let refrigerated starter return toward room temperature.
- Feeding: record the starter, flour, and water used for the feeding.
- Rise: follow the rise and optionally record temperature.
- Readiness cues: use the starter while it is risen, bubbly, lively, and not yet collapsing.
Crumblytics does not make the culture mature on a fixed schedule. It helps you follow a repeatable process and understand the observations that matter before moving into the main bread bake.