Getting started
Your First Sourdough Bake with Crumblytics
Sourdough is easier to understand when you treat it as a sequence of observable stages rather than one long recipe.
At each stage, you perform a specific action, allow time for the dough or starter to change, and then decide whether it is ready to continue. Timers help you stay organised, but the starter and dough should always have the final word.
This guide follows the same order as the guided bake flow in Crumblytics. Read it before your first bake, then follow the corresponding steps inside the app.
Minimal Equipment and Ingredients
You do not need professional bakery equipment for your first loaf. A simple, reliable setup is enough.
Ingredients
- Active sourdough starter
- Bread flour or another suitable wheat flour
- Water
- Salt
Some recipes use several flours, seeds, or other additions. For your first bake, flour, water, starter, and salt are easier to understand, record, and repeat.
Equipment
Full Process Overview
- Starter Preparation: remove the starter from the fridge, let it warm, feed it, and wait for it to rise close to peak activity.
- Autolyse: combine flour and water and allow the flour to hydrate.
- Mixing: add active starter, salt, and any remaining water.
- Bulk Fermentation & Folding: let the dough ferment as one mass and use folds to build strength.
- Divide & Pre-shape: divide the dough if needed and form loose rounds.
- Bench Rest: let the pre-shaped dough relax before final shaping.
- Final Shaping: form the loaf and create surface tension.
- Final Proof: allow the shaped dough to ferment at room temperature, in the fridge, or through a combination of both.
- Scoring: cut the dough immediately before baking.
- Baking: bake in a covered pot or use an open bake with steam.
- Cooling: allow the loaf and crumb to set before slicing.
- Save and Learn: add the bake to history with a rating, notes, and photos.
Step 1
Starter Preparation
Your starter contains the yeast and bacteria that ferment the dough. It should be active and close to peak before you add it to the main dough.
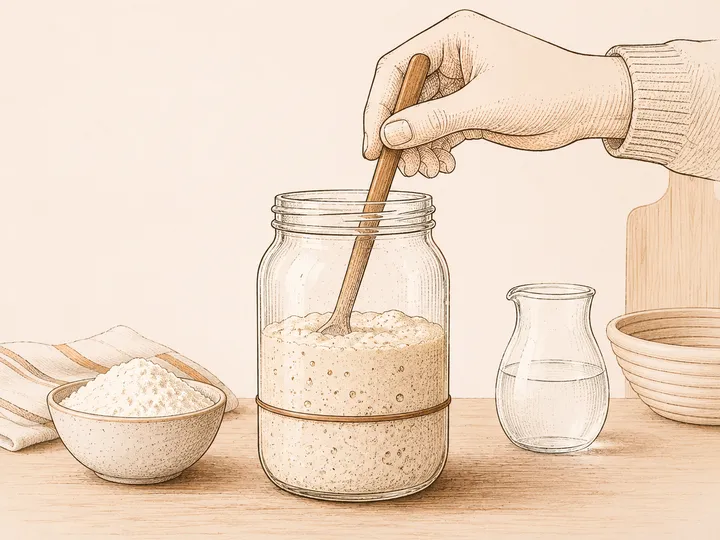
Take the Starter Out of the Fridge
If you keep your starter refrigerated, remove it before you plan to prepare the dough.
A cold starter can be fed immediately, but allowing it to warm slightly can make its activity easier to observe.
Timing guidance: around 30 to 60 minutes at room temperature is a practical starting point. It is not a strict requirement.
Warm-up
Let the starter sit at room temperature. If your kitchen is cool, it may need longer before becoming lively. If the room is warm, it may move more quickly.
Crumblytics can run a warm-up timer so you do not have to remember when you removed the jar.
Feeding
Feed the starter by adding flour and water according to your recipe or usual feeding ratio. Mix thoroughly until no dry flour remains.
Use a clean-sided jar when possible. A transparent jar makes both bubbles and growth easier to see.
Mark the starter level immediately
After feeding, mark the starting level with an elastic band, washable marker, or piece of tape. Start the starter rise timer in Crumblytics at the same time.
Rise
Wait until the starter is close to peak activity. Depending on the starter, feeding ratio, flour, and temperature, this may take roughly 3 to 8 hours—or fall outside that range.
Look for several readiness cues together:
- A clear rise above the marked starting level
- Many visible bubbles
- A slightly domed top
- A fresh, lively, fermented smell
- The starter is still holding its height
- It has not already begun collapsing
Step 2
Autolyse
Autolyse is a rest after combining flour and water. It gives the flour time to hydrate and lets gluten development begin before intensive mixing.
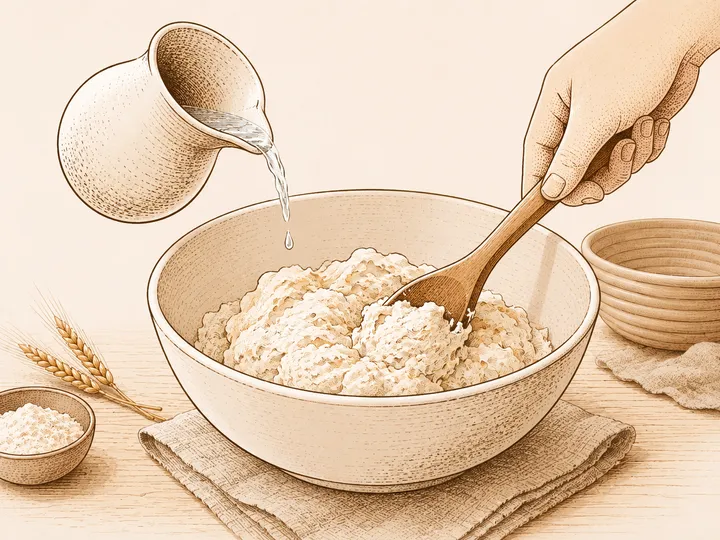
Combine the Flour and Water
Add the flour and water to your mixing bowl. Mix until no large pockets of dry flour remain.
The mixture may look rough, sticky, or uneven. It does not need to look like finished dough yet.
Cover the bowl to prevent the surface from drying.
Timing guidance: approximately 20 to 60 minutes is a practical range for a first loaf.
Hydration Basics
Hydration is the amount of water compared with the amount of flour, measured by weight.
A dough with water equal to 65% of its flour weight has 65% hydration. Higher-hydration dough is generally softer and stickier. Lower-hydration dough is usually easier for beginners to shape.
Step 3
Mixing
During mixing, you add the active starter and distribute it throughout the dough.
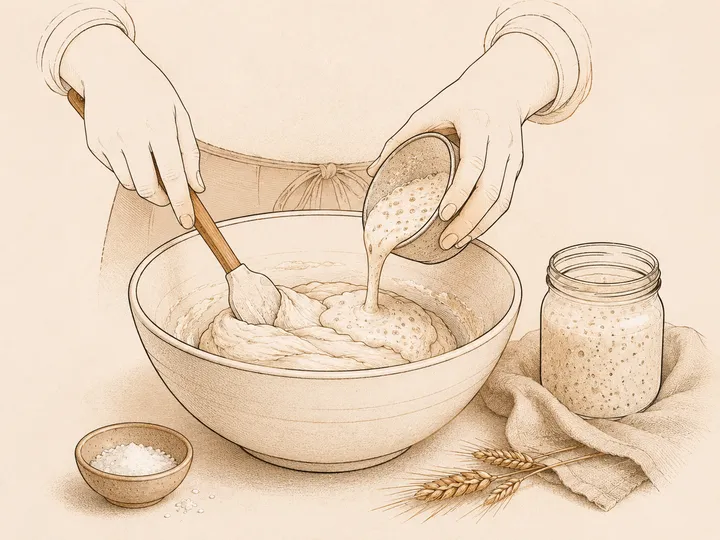
Add the Active Starter
Add the measured starter to the autolysed dough. Work it in by pinching, squeezing, folding, or using another gentle mixing method.
Even mixing matters because the starter should be distributed throughout the dough. Large unmixed areas can ferment unevenly.
Add Salt and Remaining Water
Add the salt. If your recipe holds back part of the water, add it gradually rather than all at once.
Continue mixing until the dough looks reasonably even and holds together. It does not need to be perfectly smooth. The following folds will continue developing strength.
Record Final Dough Temperature
If you have a thermometer, measure the dough temperature after mixing and record it in Crumblytics.
This measurement helps explain why one bake fermented more quickly than another. Warmer dough normally moves through fermentation faster.
Step 4
Bulk Fermentation & Folding
Bulk fermentation is the main rise after mixing. The dough ferments as one mass before it is divided or shaped.
Folding happens during the earlier part of bulk fermentation. The folds strengthen the dough while the fermentation itself continues between and after them.
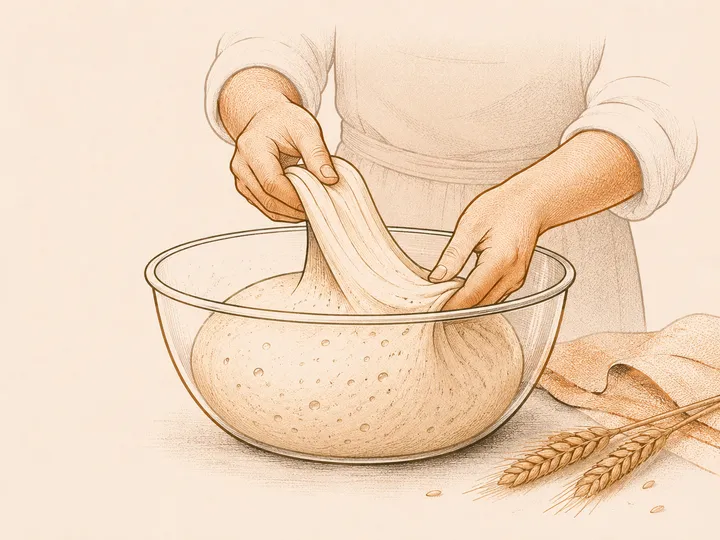
Perform Strength-building Folds
Two common methods are:
- Stretch-and-fold: lift one side of the dough, stretch it gently, and fold it across the centre. Repeat around the bowl.
- Coil fold: lift the dough from underneath and allow its ends to fold beneath themselves.
Crumblytics lets you set a fold count and run rest timers between folds.
Timing guidance: many beginner recipes use around 3 to 5 fold sets, with approximately 20 to 40 minutes of rest between them.
Watch the Dough Develop
As bulk fermentation progresses, look for:
- A smoother surface
- Improved elasticity and strength
- Less spreading after each fold
- Visible bubbles along the sides or surface
- Increased volume
- A lighter, more aerated feel
Timing guidance: bulk fermentation often takes around 3 to 6 hours, but temperature can move it well outside this range.
Step 5
Divide & Pre-shape
Dividing is necessary when making more than one loaf. Pre-shaping can still be useful when making a single loaf.
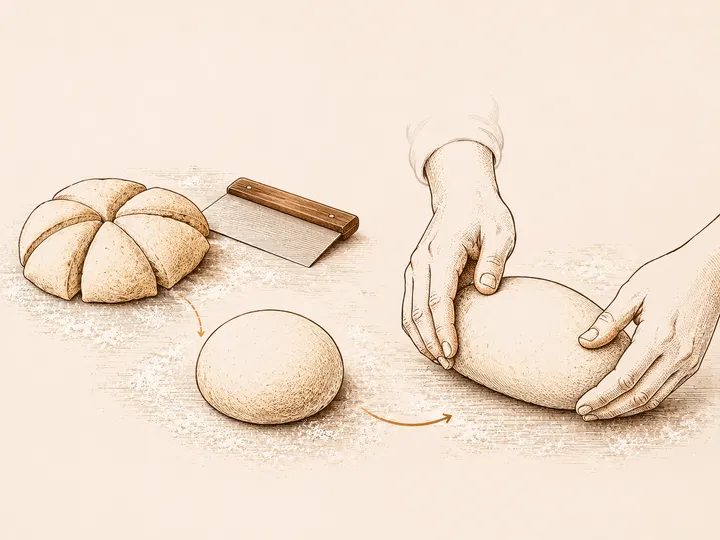
Divide the Dough if Needed
Turn the dough onto a lightly floured surface. If you are making several loaves, divide it with a dough scraper.
Make clean cuts instead of repeatedly pulling or tearing the dough.
Pre-shape into Loose Rounds
Gently organise each portion into a loose round. The aim is to give the dough an initial structure, not to create maximum tension yet.
Step 6
Bench Rest
Leave the pre-shaped dough on the work surface so the gluten can relax before final shaping.
Timing guidance: approximately 15 to 30 minutes is common.
If the dough strongly resists stretching during final shaping, it may need a little longer. If it spreads excessively, it may already be very relaxed or lack strength.
Step 7
Final Shaping
Final shaping gives the loaf its form and creates surface tension that helps it rise upward instead of spreading flat.
Choose a Loaf Shape
- Boule: a round loaf
- Batard: an oval or oblong loaf
Build Surface Tension Carefully
Fold and tighten the dough using your chosen shaping method. The outer surface should become smoother and gently taut.
Work carefully enough to preserve some of the gas created during bulk fermentation.
Place the shaped loaf into a prepared proofing basket, commonly with the seam facing upward.
Step 8
Final Proof
Final proof is the fermentation stage after shaping. Crumblytics supports several proof stages, allowing a warm proof, cold proof, or hybrid schedule.
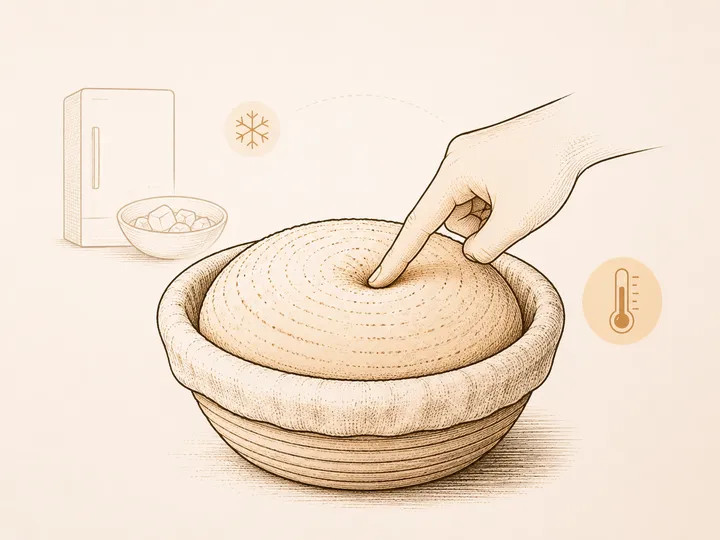
Warm Proof
Keep the shaped loaf at room temperature until it is ready to bake. This is faster, but requires closer observation.
Cold Proof
Place the shaped loaf in the refrigerator. Cold proofing is slower, easier to schedule, and often improves flavour.
Hybrid Proof
Begin with a warm proof, then move the dough into the refrigerator for a cold finish.
Timing guidance: a warm proof may take around 1 to 4 hours. A cold proof often lasts around 8 to 18 hours. These are broad ranges, not guarantees.
Check Final-proof Readiness
Gently press the surface with a lightly floured finger.
- If the dough springs back quickly and completely, it may need more time.
- If it returns slowly and keeps a slight dent, it may be ready.
- If it does not recover and feels fragile, it may be overproofed.
The poke test is only one clue. Cold, wet, rye-rich, and wholegrain doughs may respond differently. Consider timing, temperature, volume, and dough feel together.
Step 9
Scoring
Score the dough immediately before loading it into the oven.
An expansion cut creates a planned weak point in the dough’s surface. It gives the loaf somewhere to open during oven spring.
- Make sure the oven, pot, or steam setup is ready.
- Turn out the proofed loaf.
- Use a sharp blade or lame.
- Make one confident expansion cut.
- Load the dough promptly.
Step 10
Baking
Fully preheat the oven and any baking vessel before loading the loaf. Strong initial heat supports oven spring and crust development.
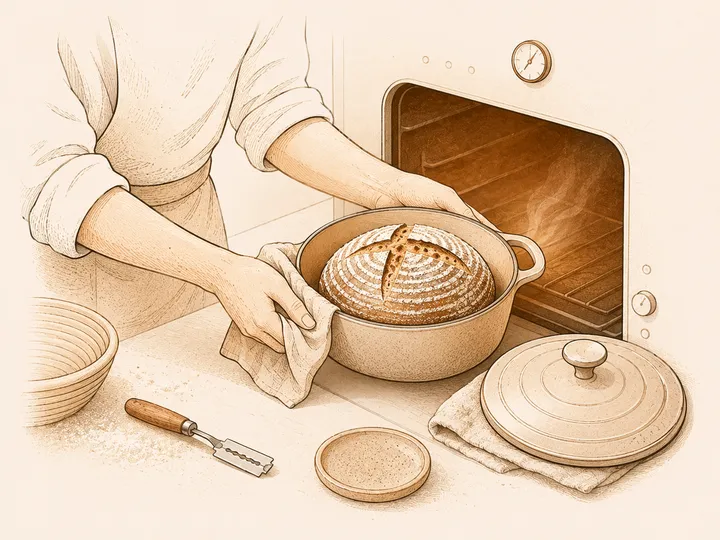
Choose a Baking Method
Covered Pot
A preheated Dutch oven or another oven-safe pot with a lid traps steam released by the dough.
Bake with the lid on during the first phase, then remove it so the crust can brown and become crisp.
Open Bake with Steam
The loaf bakes uncovered on a tray, stone, or steel. Steam must be added through an appropriate oven setup, such as a hot metal steam tray.
After the initial expansion phase, release the steam or remove the steam tray according to your setup.
Why Steam Matters
Steam keeps the crust flexible during the first part of baking. This gives the loaf time to expand before the crust hardens.
After expansion, removing the lid or releasing steam allows the crust to dry and brown.
Timing guidance: many sourdough loaves bake for approximately 35 to 50 minutes, usually with an initial covered or steamed phase followed by an uncovered phase.
Step 11
Cooling
Take the bread out of the baking vessel and move it to a cooling rack. Air should be able to circulate around the loaf.
Cooling is part of the baking process. Moisture continues moving through the crumb, and the internal structure becomes more stable.
Timing guidance: cool a typical loaf for around 1 to 2 hours before cutting. Larger or especially moist loaves may need longer.
Step 12
Save and Learn
Once the loaf has cooled and you can inspect the crust and crumb, finish the guided bake in Crumblytics.

Record the result while the details are still fresh:
- Save the completed bake to History.
- Add an overall rating.
- Rate taste, crumb structure, crust, and rise where available.
- Add notes about what worked and what you would change.
- Add photos of the whole loaf and sliced crumb.
A single bake cannot prove that one variable caused a particular result. Over several bakes, however, consistent records make useful patterns easier to recognise.
Crumblytics can use your recorded timings, temperatures, ingredient data, starter growth, proofing stages, and ratings to create more relevant estimates and comparisons for later bakes.
Common First-bake Mistakes
Using a weak starter
A starter that has barely risen may ferment the dough very slowly. Wait for clear growth, abundant bubbles, and a top that is still holding its shape.
Using the starter after it has collapsed
A starter that peaked long ago may no longer be at its strongest. Time the autolyse so mixing can begin while the starter is still near peak.
Following the clock without checking the dough
Temperature changes fermentation speed. Confirm each stage using volume, bubbles, strength, airiness, and dough feel.
Confusing folds with the whole bulk fermentation
Bulk fermentation continues between and after the folds. Finishing the last fold does not automatically mean the dough is ready to shape.
Adding too many folds
Once the dough is smoother, elastic, and holds its shape, additional handling may no longer improve it.
Adding too much flour while shaping
Excess flour can prevent the dough from gripping the work surface and make tension harder to create. Use only enough to prevent severe sticking.
Shaping too aggressively
Excess pressure can remove much of the gas created during bulk fermentation. Create tension without flattening the dough completely.
Underproofing or overproofing
Underproofed dough may resist expansion. Overproofed dough may feel fragile, spread easily, and produce limited oven spring.
Using an oven or pot that is not fully preheated
Insufficient initial heat can reduce oven spring and produce a pale or unusually thick crust.
Cutting the bread while it is still hot
Let the loaf cool for 1 to 2 hours so the crumb has time to set.
How Crumblytics Helps During the Process
Crumblytics keeps the process organised while leaving readiness decisions in your hands.
- Guided stages: follow the bake in the same order described in this article.
- Timers and reminders: track starter rise, rests, folds, proof stages, and baking phases.
- Temperature records: save measurements that may explain faster or slower fermentation.
- Fold tracking: record completed folds and the rests between them.
- Warm and cold proof stages: record room-temperature, refrigerated, or hybrid proofing schedules.
- History: save completed bakes with timings, ingredients, ratings, notes, and photos.
- Learning over time: compare previous results and improve future estimates using your own bake history.
Crumblytics does not guarantee a perfect loaf. Flour, starter condition, room temperature, technique, and oven behaviour all vary. The app helps you follow a repeatable process and make better-informed decisions with each bake.